
OpenXml Microsoft Word Table Generator
This article demonstrates how to integrate the OpenXml framework into an ASP.NET MVC 3 web application to generate Word documents and insert a table with content controls into it, and then populate that table with data from a database.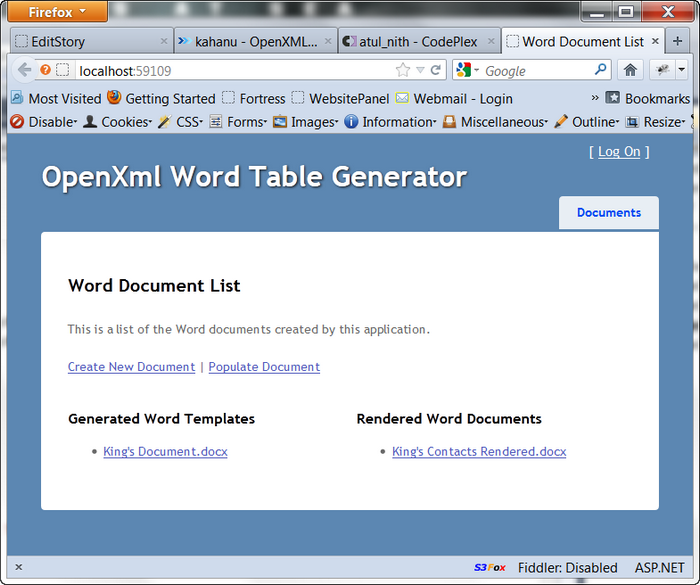
For those who don't know, OpenXml is a framework that allows you to programmatically create Microsoft Office documents and manipulate various properties and operations. A good place to get started with OpenXml is at this address: http://openxmldeveloper.org/.
Origin of this exercise
The reason I created this component in the first place was out of need. I'm presently working on a project for a client where I had to build a web application that would allow my client to dynamically create Word documents, and some of them needed tables that would be populated with data from a database.I did some tests and found that it wasn't all that hard to create a table in Word, add content control into the table cells that would be populated with data from a database. The problem was that I soon realized that this project would required maybe 30 Word documents with custom tables. Each table would be different and need to be populated with data from a different datasource.
I looked around for an open source solution somewhere for this and couldn't find one. I did find a great framework for creating components that would be able to manipulate Word documents and populate them with data.
http://worddocgenerator.codeplex.com/
This framework built by Atul Verma helped me with the part of the project that would allow me to generate the Word documents and populate them with data. I highly recommend downloading his framework if you are interested in Word automation.
I still needed a way to dynamically generate the tables quickly. So I built it myself.
TableBuilder Component
This is what I call the component that can easily build the table to be inserted into a Word document. In the downloadable source code, I show how it's a completely separate component that I've integrated into a console application and an ASP.NET MVC 3 application.It simply does one thing, it creates a Word table from your definition. You decide where in the document it is placed.
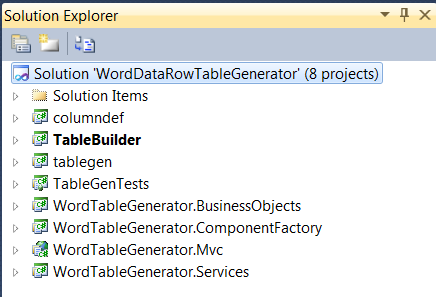
WordTableGenerator.Mvc
There are four projects for this ASP.NET MVC 3 application:- WordTableGenerator.Mvc - this is the MVC application
- WordTableGenerator.BusinessObjects - these would be the domain objects as represented by your data entities. There can also be ViewModels here that could be shared across all projects.
- WordTableGenerator.Services - these are the services used by the MVC controllers
- WordTableGenerator.ComponentFactory - this is the project that contains the various classes that handle the Word generation and insert the table
I've tried to build this little Mvc application in a real-world way so you can see how this would work in a working application.
For this demonstration, the data that populates the Word table for my example is simply hard coded into the KingsDocumentClient class in the component factory.
What does this application do?
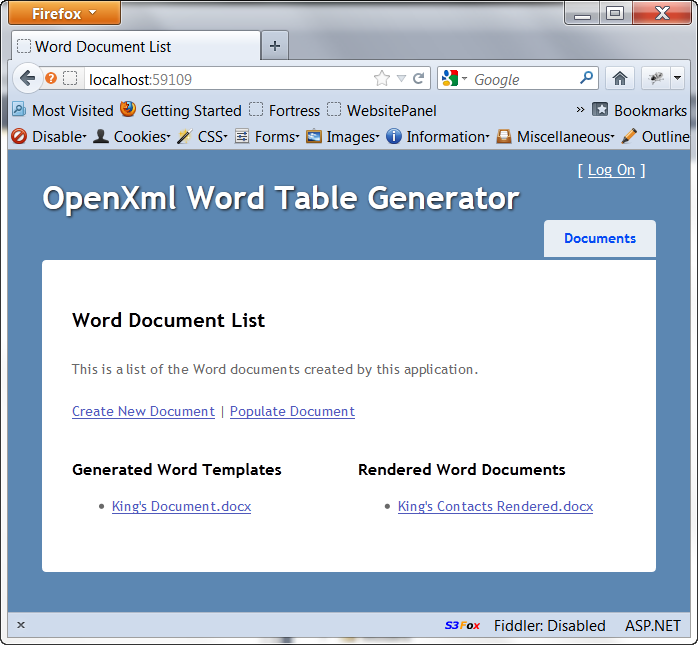
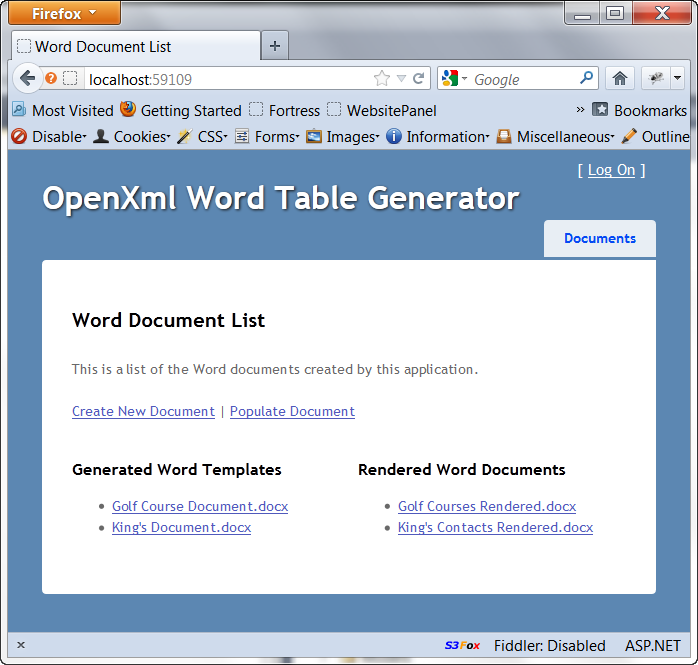
I needed to make the process of creating Word documents with tables as easy as possible, and also easy for someone else to create them besides me. So I built a one-step process to create the documents with the tables, and another step for populating them with data.This is the web application home page.

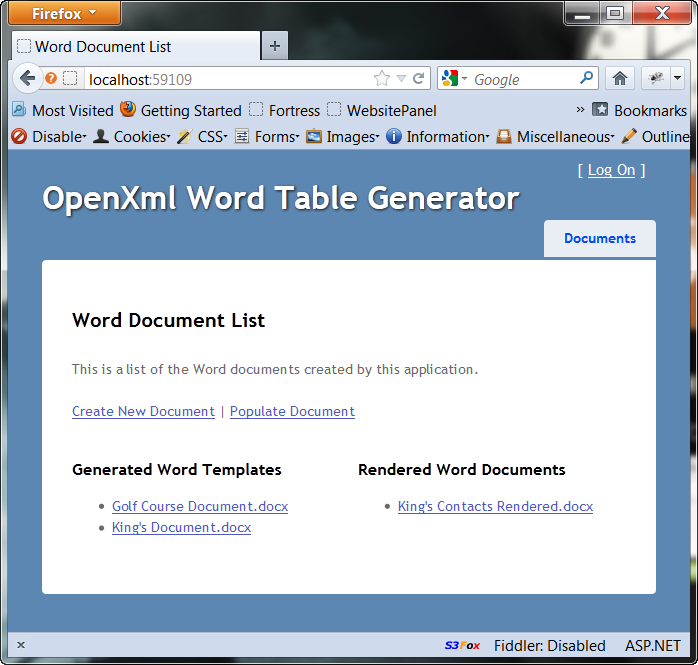
It shows two links: Create New Document and Populate Document. These links do exactly what they say.
There's also two labels, Generated Word Templates and Rendered Word Documents. These are columns that will contain a list of documents that are either generated by this application, or populated with data from this application.
To create a new document with a Word table inserted into it, we click on the Create New Document link.
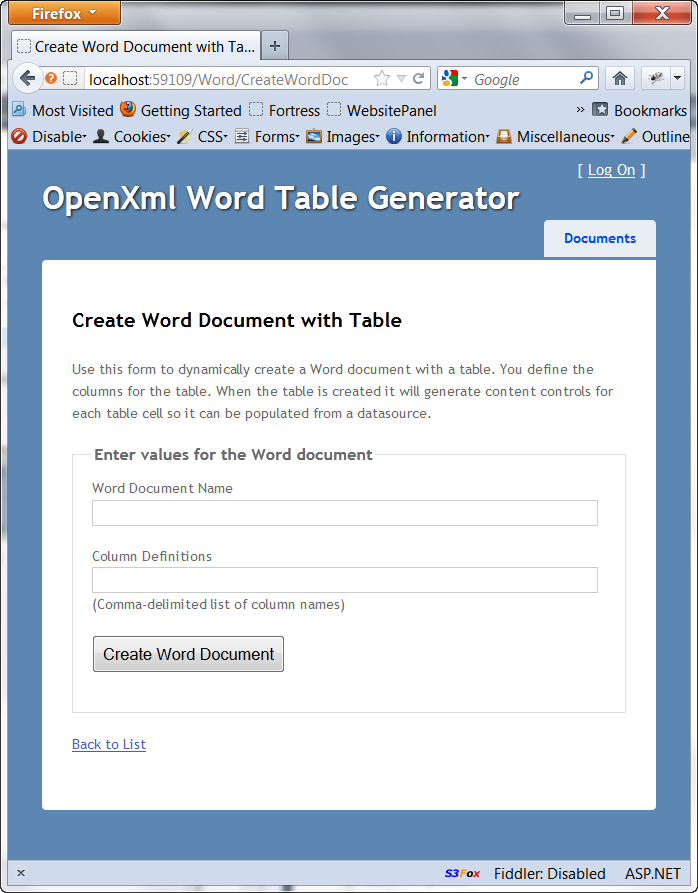
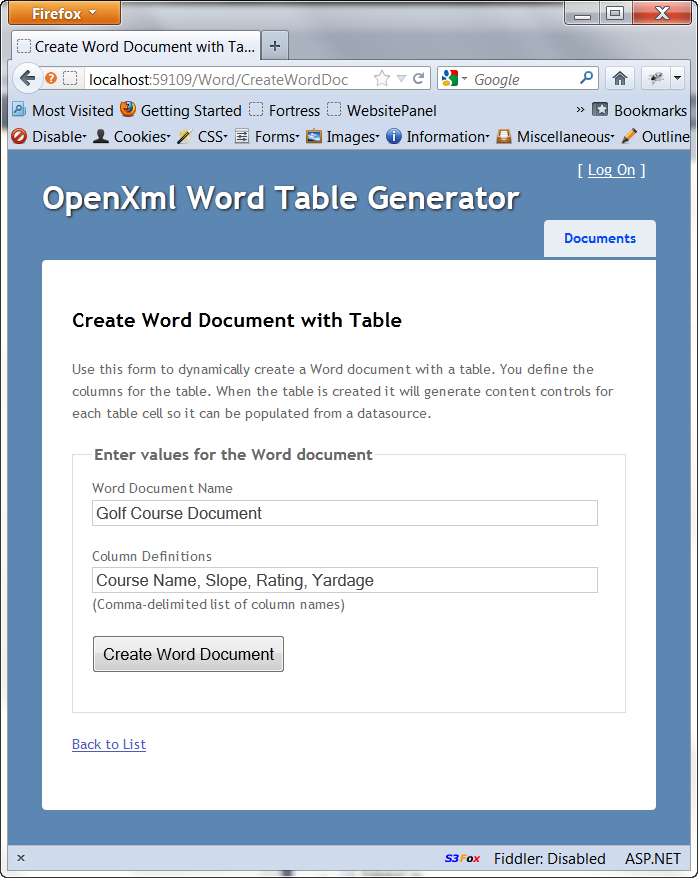
In the Word Document Name field we enter the name of the document that will be created. This will be the filename of the document and the title placed at the top of the created Word document.
In the Column Definitions field, enter the list of column names that will be generated inside the table. This should be a comma-delimited list of names.
(For this working demonstration I've built only two datasources that can populate documents, so the document names and column definitions must match the values below. You can create a new data source and a new document generator class to test this with.)
Values to be used for testing purposes:
- "King's Document" - "First Name, Last Name, Email, Phone"
- "Golf Course Document" - "Course Name, Slope, Rating, Yardage"
Enter the values above into the form to generate a new document with a table. I will first create my "King's Document".

When I click the "Create Word Document" button, and no errors occur, I will be taken back to the home page.
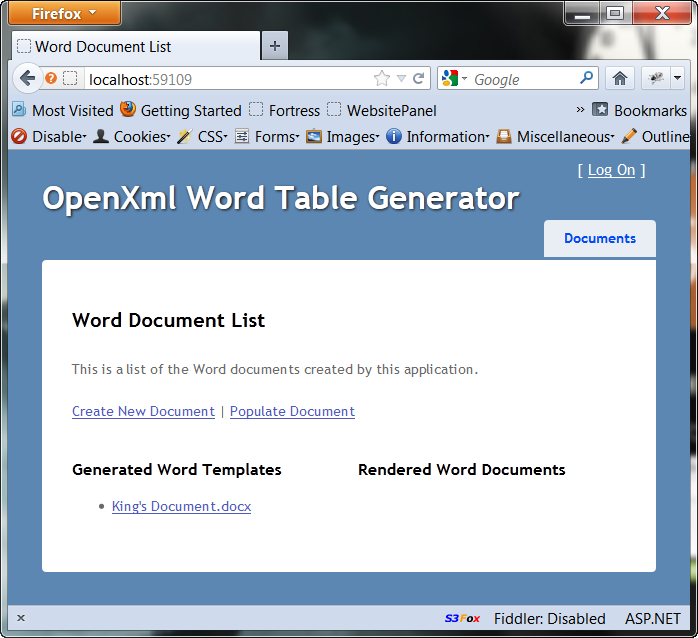
Now a few things happened here.
- Column Definitions - the column definitions xml file was created
- Document created - the document was created with the Word table and saved in the Templates folder
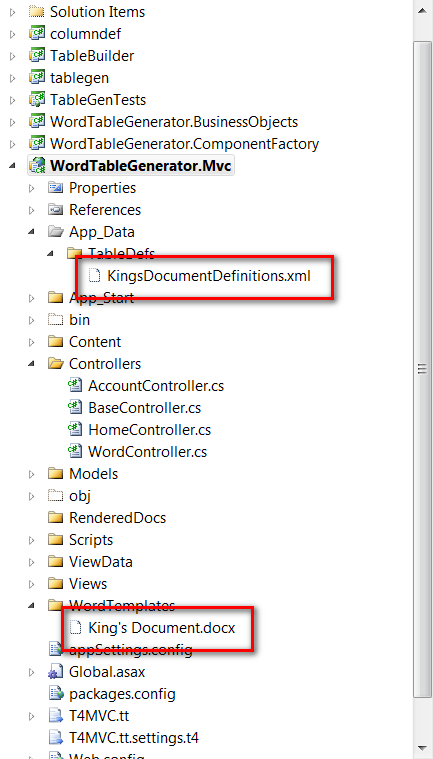
This is the Xml definitions file that describes the columns based on the names entered into the form.
01.<?xml version="1.0" encoding="utf-8"?>02.<columndefinitions tablecontentcontrolname="KD">03. <headings>04. <heading>First Name</heading>05. <heading>Last Name</heading>06. <heading>Email</heading>07. <heading>Phone</heading>08. </headings>09. <rowcontainer title="KDDetailRow" tag="KDDetailRow">10. <columns>11. <column title="FirstName" tag="FirstName" />12. <column title="LastName" tag="LastName" />13. <column title="Email" tag="Email" />14. <column title="Phone" tag="Phone" />15. </columns>16. </rowcontainer>17.</columndefinitions>You can see that the Title of the document, "King's Document" was trimmed to "KD" and placed in various positions in the Xml. This is because in Microsoft Word, the Alias and Tag fields for the content controls only hold 63 characters. And for longer file names (titles), this can pose a problem, so I reduced that to use just the first character from each word in the title.
It also removes the spaces between words like "First Name" for the content control values.
It's this file that the TableBuilder component will use to generate the table cells for the table.
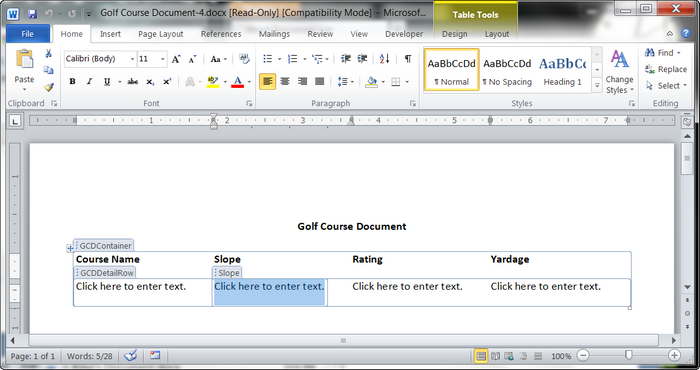
I'll click on the link of the generated file and take a look at the generated Word document. We'll see that it's created as we expected with the Title at the top of the page and the table created below it.

Now this document is ready to be populated with data from a database.
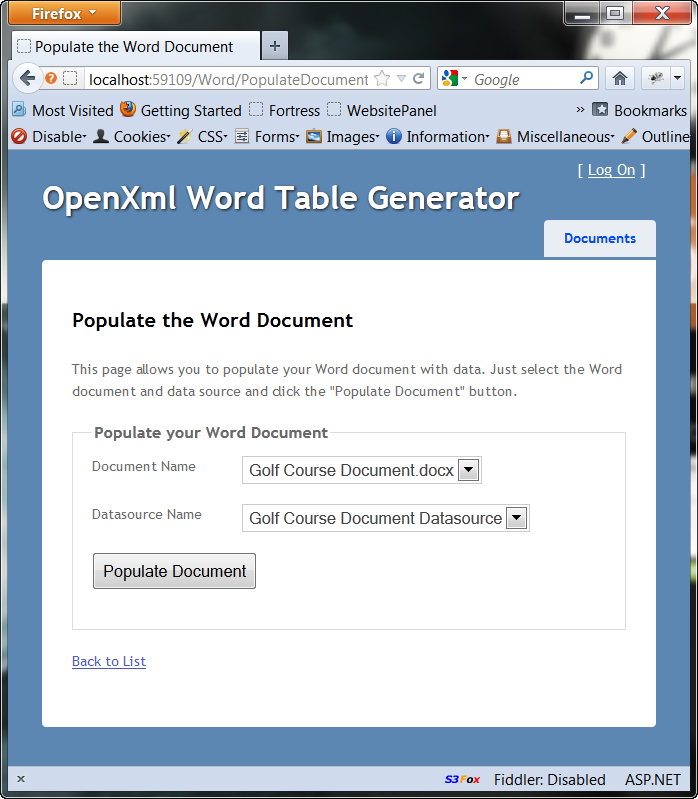
For this we can click the "Populate Document" link. When we do we see the following page:
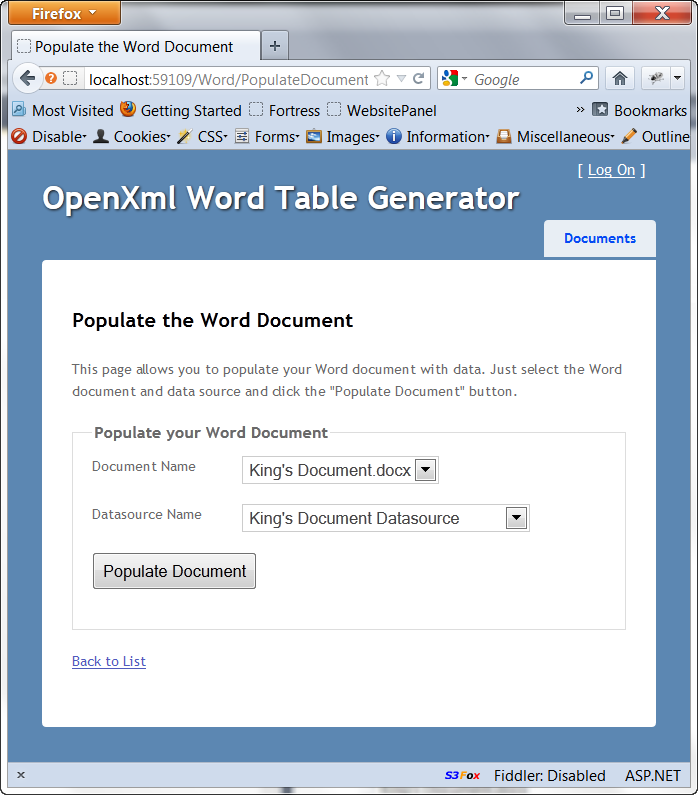
I've only created one Word template, "King's Document", so only one choice appears in the drop down. But for this demonstration I've already created two datasources, one for this document and another for the second example I show you shortly.
When I click on the "Populate Document" button with the two King's Document values selected, the Word template will be used to create a new Word document that will be populated with data. We will then be redirected back to the home page.
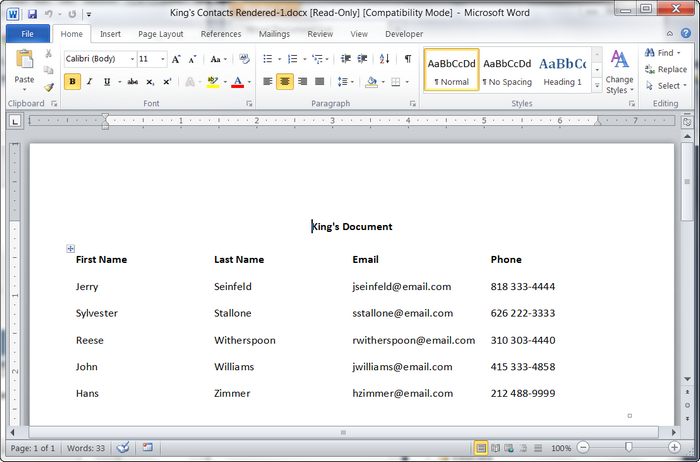
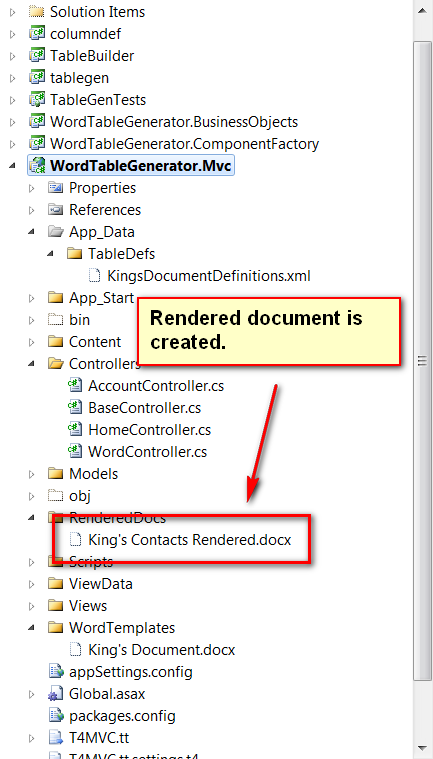
Now if I click on this new link for the rendered document we will see the table is fully populated with data.
If we look back in Visual Studio we can see that the rendered document now exists in the folder.
Now I'll create one more document template and populate it with completely different data to show how flexible this can be.
I'll create a new document.
We can see that the new Word template has been successfully created.
This is the Xml column definitions file.
01.<?xml version="1.0" encoding="utf-8"?>02.<columndefinitions tablecontentcontrolname="GCD">03. <headings>04. <heading>Course Name</heading>05. <heading>Slope</heading>06. <heading>Rating</heading>07. <heading>Yardage</heading>08. </headings>09. <rowcontainer title="GCDDetailRow" tag="GCDDetailRow">10. <columns>11. <column title="CourseName" tag="CourseName" />12. <column title="Slope" tag="Slope" />13. <column title="Rating" tag="Rating" />14. <column title="Yardage" tag="Yardage" />15. </columns>16. </rowcontainer>17.</columndefinitions>You can see that this could be tedious to manually create for every table you wanted to create. Automation is a truly great thing!
This is the newly created golf course Word template.
Now I'll populate it with data. (Again, I've already included a component that has static data that will populate the template with data.) I'll click on the "Populate Document" button.
Now I have two selections in each drop down, and I'll choose the Golf Course items in both.
This is the home page with the links to all the documents.
Here's a look at the populated Golf Course Word document.

That's it!
Summary
In just a few steps you are able to create a Word document with a table that contains content controls that are used to be populated with data from a datasource, and populate it.Look at the ComponentFactory project to see what I did to incorporate the WordDocumentGenerator.Library assembly into the project to create the documents and templates, and how I created a simple factory to make it easy to add your own classes.
I hope you found this article and the associate video helpful.
Thank youforthis tutorial,
I havealmostthe same needwiththeability to attachthe document tothe application fromthe Officeinterface.
Can you help me?
I havealmostthe same needwiththeability to attachthe document tothe application fromthe Officeinterface.
Can you help me
I got error to open the solution.
C:\Users\nluu0\Downloads\WordDataRowTableGenerator (1)\WordDataRowTableGenerator\TableGenTests\TableGenTests.csproj : error : The project file 'C:\Users\nluu0\Downloads\WordDataRowTableGenerator (1)\WordDataRowTableGenerator\TableGenTests\TableGenTests.csproj' cannot be opened.
The project type is not supported by this installation.
C:\Users\nluu0\Downloads\WordDataRowTableGenerator (1)\WordDataRowTableGenerator\WordTableGenerator.Mvc\WordTableGenerator.Mvc.csproj : error : The project file 'C:\Users\nluu0\Downloads\WordDataRowTableGenerator (1)\WordDataRowTableGenerator\WordTableGenerator.Mvc\WordTableGenerator.Mvc.csproj' cannot be opened.
The project type is not supported by this installation.